Wednesday, June 12, 2013

Butterfly Chocolate Cupcakes


The other day I was in charge of making dessert for a dinner we were having at a friend's house. Of course I wanted to make something complicated. Here enters Pinterest :) I had been wanting to make these chocolate butterflies for a while now and this was the perfect opportunity. Unfortunately, the instructions specifically said "use almond bark. Do NOT use chocolate chips, they will not hold the shape." Well the store didn't have almond bark and really how bad could chocolate chips be? Lesson learned: when it says don't use chocolate chips, don't use chocolate chips. They turned out fine, but not great. They still tasted fantastic though! Recipe at the bottom, as always.


Chocolate Cupcakes
1 2/3 C Flour
1 1/2 C Sugar
1/2 C Cocoa
1 1/2 t Baking Soda
1 t Salt
1/2 t Baking Powder
2 Eggs
1/2 C Shortening (I used butter)
1 1/2 C Buttermilk (or sour milk)
1 t Vanilla Extract

Preheat your oven to 350 degrees. Mix together the dry ingredients. Add the eggs, shortening, buttermilk, and vanilla and mix for 3 minutes. Fill the muffin cups 1/2 full. I actually filled mine a little more than that, about 2/3rds full, because I wanted a little poof top to the cupcakes. Bake 18-20 minutes or until the cupcake bounces back when you touch it. 

Mocha Frosting 
Warning: This is the best frosting I have ever had in my entire life. You will be addicted.
1 Stick Butter
1/2 C Cocoa
1/3 C Milk
1 t Vanilla
1 T Instant Coffee
2 2/3 C Powdered Sugar

Butterfly Toppers:
Melt your almond bark in a double boiler. You can put the melted chocolate in a cake decorating bag or a ziplock bag, just make sure the tip you are piping out of is big enough to create a thick piping line. Pipe the chocolate flat onto wax paper using a pattern. If you trace the pattern onto the paper instead of just placing it behind the paper make sure to flip the wax paper over. You don't want to eat sharpie! ;) After you pipe the butterfly put the wax paper on an open book and chill it in the fridge until firm. Enjoy!

post signature

Tuesday, June 11, 2013

Pinterest Weekend Installment Three: Book Docks

If you missed Pinterest Weekend Installment One (backpacks) and two (silverware jewelry) you can find them here and here.
 After finishing our jewelry we moved on to the next project on the list: book docks! We started with two books from the thrift store for 50 cents each. We used these instructions to make them. It's actually very easy, all you have to do is be patient enough to make it happen. I wasn't as patient as I could have been so I'm not amazingly happy with the way mine turned out, but it will do for now :) I mean, for 50 cents I can try again in a couple weeks with no harm done! If I try to make another one I will definitely take more time. I think I'd also put the hole farther back on the book. The way it is now it leans forward a little, putting a lot of strain on the spine of the book. I didn't get any pictures of Gabby's finished product, but her's looks awesome too!


 Gabby was super happy she was almost done!

post signature

Monday, June 10, 2013

Pinterest Weekend Installment Two: Silverware Jewelry

If you missed the first installment (DIY backpacks with only one yard of fabric) you can find it here.
 Four hours of sleep later we were back in crafting business!


 The most we paid for these were $1 each, but some we got for less.
 The first one cut! We cut the handles off with a hacksaw and then sanded the edges with a fancy sander thing that my dad said to use. (Funny story: when we first got back to the house after shopping we were telling my mom all about our plans and mentioned this project. She skeptically asked, "how are you going to get the handle off the spoon?" I immediately looked to my dad and said, "you have a tool thing, right?" He did, just like I thought he would :) He even had a cool sander thing so sanding look less than two minutes instead of thirty) It was taking FOREVER to hammer the spoons into ring shape so I thought, "we should figure out if my dad has a torch of some kind in this massive garage." I was right! He had a propane lighter thing that I figured we could use. Once again, my parents were gone (they like to be out of the house during the awake portions of my sleepovers so the estrogen level in the house doesn't overwhelm my dad), so I was left to figure out how to turn it on by myself (well, myself and Gabby, but our collective brain power on such things is minimal.) It took us about 10 minutes to figure out how to get the thing lit, but once it was lit we were in business!
We were super safety conscious, can't you tell? Gabby said "I think I should put my hair up so it doesn't get burned, but then I have to go inside and get a hair tie..." I told her that sticking it in her hood would probably work. We couldn't find any safety glasses so sunglasses are basically the same thing, right? Anyways, once we had the torch it was lots easier to get the spoon to bend, but we still couldn't get the thicker part of the handle to bend. By then we were ready to move on to the next pinterest idea and contented ourselves with two-finger rings.


Please ignore my ridiculously short fingers and chipped nail polish. Thank you.
 Gabby's ring
Isn't her nail color absolutely adorable? I think so too.
post signature

Sunday, June 9, 2013

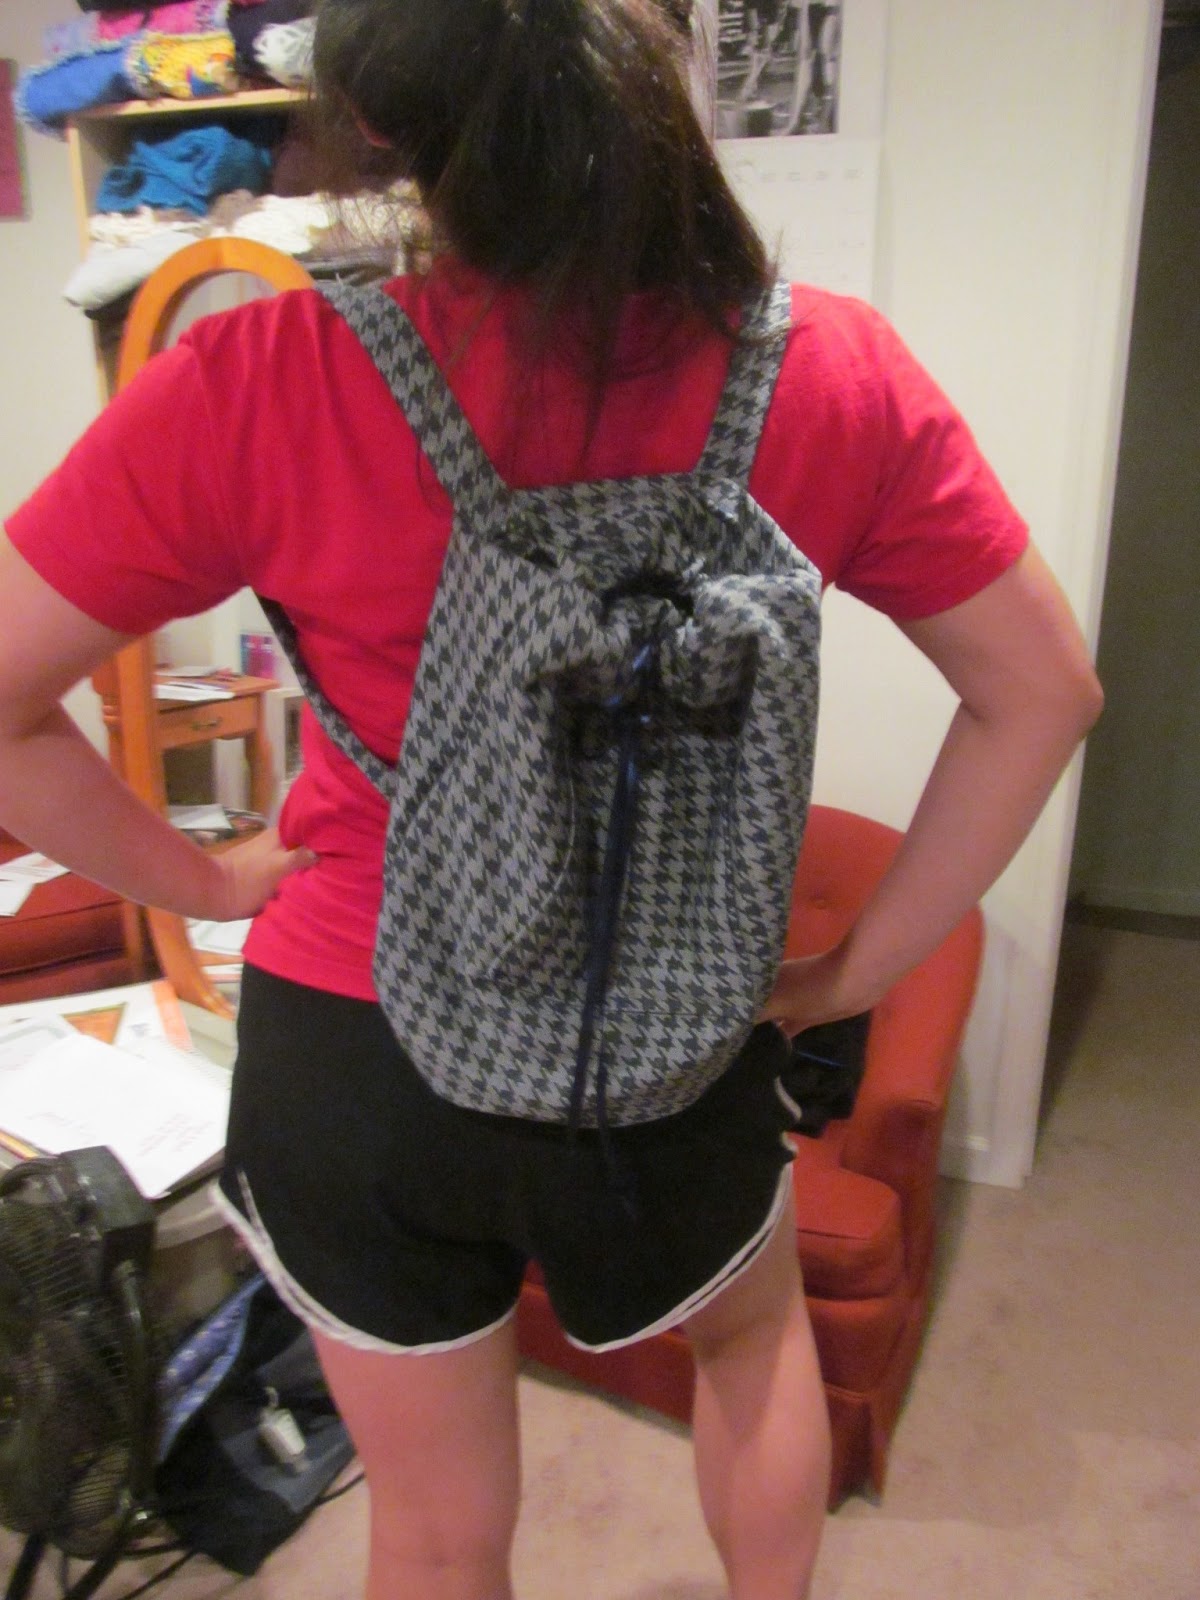
Pinterest Weekend Installment One: Backpacks


Every sleepover is planned for crafting purposes, right? Well if they're not they should be. My fabulous friend, Gabby, and I planned a Pinterest Party and I will give it to you in three posts. Here you have Installment One: The Backpacks. 
 First we had to go shopping. I mean seriously, even if we had everything we needed we would have gone shopping...but whatever. This is the stash we came back with, and it only cost us about $35! If that sounds like a lot to you, you can think about it this way: the towels cost us $5 each and we needed four, so that's 20 right there. The glow sticks, silverware, fabric, and books added together bumped it up to $35, so it was basically a steal.
 I had seen a pin on how to make this backpack with only one yard of fabric. Is this for real?? Yes, my friends, it is. And it's totally not hard either! 
 This is what we looked like at around 6ish when we started. Look how happy and optimistic we are!
 We printed the pattern (it was so easy to follow!) and started cutting out the pieces. Gabby's fabric was only two dollars at a thrift store and she had way more than she needed! I bought a fitted sheet from a different thrift store for $1.75 and had extra as well! After cutting everything out we started sewing it together. I don't have any during pictures, so you'll have to go to the original site, but her directions are super easy to follow! It was going to be great because my mom has two sewing machines so Gabby and I could sew at the same time, but two seconds into sewing I broke one of them and my parents were gone for the evening so we had to make due with one... I ended up doing most of the sewing because Gabby is a novice sewer and didn't want to mess anything up. Needless to say, with only one machine we weren't done with the backpacks until around 4am. But we did take about a one hour break in the middle, and the second backpack went much faster than the first one because I didn't have to stop and read the directions the whole time. I have to say, this is my new favorite bag. It is super cute, the perfect size, and has loads of memories attached!
 At 4am, still smiling! 
 Little miss sassy with her finished backpack :)


Check back tomorrow for installment two, silverware jewelry! 
post signature

Tuesday, June 4, 2013

Flowers In My Hair, Water at My Feet

So today I woke up 30 minutes after my meeting started... I blindly reached into my closet, threw this on and ran out the door. Luckily it could be rescheduled and no real harm was done. Lesson learned: always set an alarm, no matter how late in the day the appointment is.

post signature

Monday, June 3, 2013

Bubble Love

 No we're not drinking; yes we are blowing bubbles; yes we are 17; no we are not ashamed. :) This is one of those Pin Win situations, and let's be honest, those are the best kind of situations. There are only five things you need to make this Incredibly Fun Bubble Pin Win Situation and those things are: 1. a plastic bottle 2. dish soap 3. water 4. a dish rag and 5. a best friend (you could do without a best friend, but your IFBPWS won't be nearly as fun without her). So it's super easy to do this. You cut the bottom off your bottle and rubber band (I lied, you need six things) your dish rag to the bottom. Then fill a bowl with one part dish soap and two parts water. Then dip the dish rag end of your bottle into the soapy water and create bubbles! 
 Even Hank liked the bubbles!
 It is also possible to have a bubble war, which I would highly recommend.

You too can be this happy, just blow bubbles with (at) a best friend :)
post signature

Sunday, June 2, 2013

Popcorn Chocolate Chip Cookies

 Say what?? You're putting popcorn in perfectly good chocolate chip cookies?? Well you have to understand something: my family LOVES popcorn. We try to have popcorn for dinner at least once a week. And when you get the chance to combine popcorn and cookies can you really pass that up? I think not.
You know those flavors that just go together? Peanut butter and jelly, hot tea and honey, apples and caramel. Well it's time to add popcorn and chocolate to this list. Seriously delish. Make them. You can thank me later :)

Popcorn Chocolate Chip Cookies (found here)
2 T Oil
1 T Butter, melted
1/4 C Unpopped Popcorn Kernels
1/4 t Salt
1/2 C Butter, softened
1/2 C Brown Sugar
1/3 C White Sugar
1 Egg
1 t Vanilla
1 1/4 C Flour
1/2 t Baking Powder
1/4 t Salt
1/2 C Chocolate Chips

Preheat your oven to 350 degrees. Then pop the popcorn. You can do this multiple ways, the easiest being with a popcorn popper. If you don't have one you can pop it in a brown bag in the microwave or in a skillet on the stove. After the popcorn is popped (using the kernels, oil, butter, and 1/4 t salt) set it aside. In a mixer, mix together the butter and sugars. Add the egg and vanilla. Add the flour, baking powder and 1/4 t salt until just combined. Fold in the popcorn. It will seem really uneven at first but keep stirring; the popcorn breaks down. Now fold in the chocolate chips. Drop on greased or covered cookie sheets by the spoonful and bake at 350 for 10-13 minutes. Let them cool for 5 minutes before transferring them to a wire cooling rack. Enjoy!

post signature
Related Posts Plugin for WordPress, Blogger...